

How To Diy Repair Refrigerator
How to Repair a Refrigerator
Fix the most common refrigerator problems yourself — and salvage the expense of a service telephone call!
![]() Time
Time
A full day
![]() Complexity
Complexity
Beginner
![]() Cost
Cost
Less than $xx
Introduction
Learn simple fixes for the 4 most common fridge problems: an water ice maker breakdown, water leaking onto the floor, a cooling failure and also much noise.
Tools Required
Fixing Common Fridge Issues
Chances are, yous can solve a refrigerator repair yourself, save some money and avoid the expense and inconvenience of a service appointment. The post-obit article will walk you through the simplest solutions to the most mutual fridge malfunctions.
Plus, check out these simple fixes for mutual appliance bug.
Project step-by-step (23)
Footstep one
Refrigerator Repair Problem: Ice Maker on Strike
- Instead of looking up "fridge service almost me," employ this guide to prepare your refrigerator yourself.
- When an ice maker stops working or produces only tiny cubes, it'southward usually because the water supply is partially or completely blocked.
- To find and fix the blockage, check out the 3 mutual trouble spots. Nosotros'll become into more particular in the steps below.

Pace 2
Piece of cake Fixes for an Ice Maker
- To begin, check the h2o inlet tube for ice.
- Pro tip: The tube that supplies h2o to your water ice maker tin become plugged with water ice when the h2o force per unit area is low. The trickling h2o freezes and plugs the tube earlier information technology reaches the ice maker.
- To remove the water ice maker, take out the screws that hold the water ice maker in place.
- Unplug the wiring harness and remove the ice maker to expose the water inlet tube.
Always unplug the refrigerator before you make any repairs.

![]()
Step 3
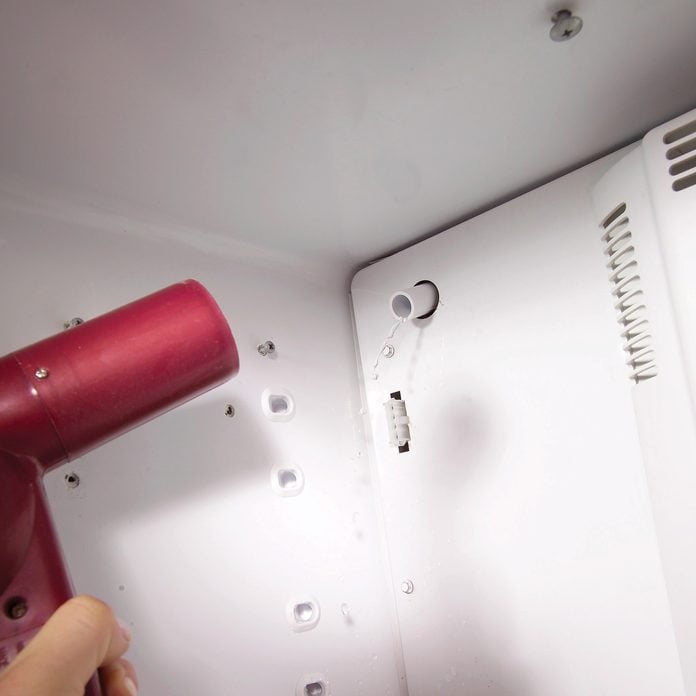
Melt the Ice
- Melt the water ice in the water inlet tube with a hair dryer.
- Don't terminate until water stops dripping from the tube.
Step 4
Unblock the Saddle Valve
- Most ice makers are connected to the household h2o supply past a "saddle" valve. One problem with saddle valves is that the needle hole in the piping can clog.
- Fortunately, that blockage is easy to clear once you locate the saddle valve.
- Pro tip: If you take an unfinished basement, you'll probably find a tube beneath the fridge that leads to the valve. Otherwise, await nether your kitchen sink.

Footstep 5
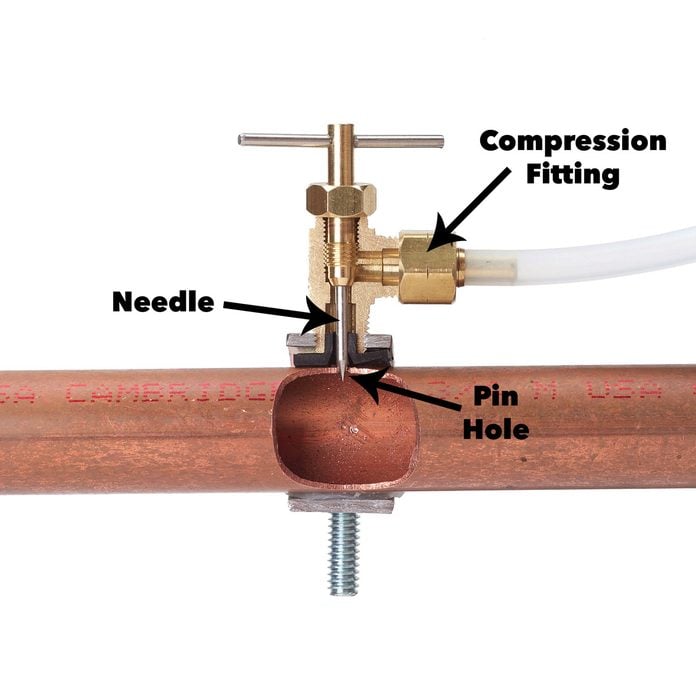
Close-Up of a Saddle Valve
- Turn the saddle valve clockwise to unblock it.
- Firmly tighten information technology to clear mineral deposits from the pinhole.
- And so reopen the valve.
Step 6
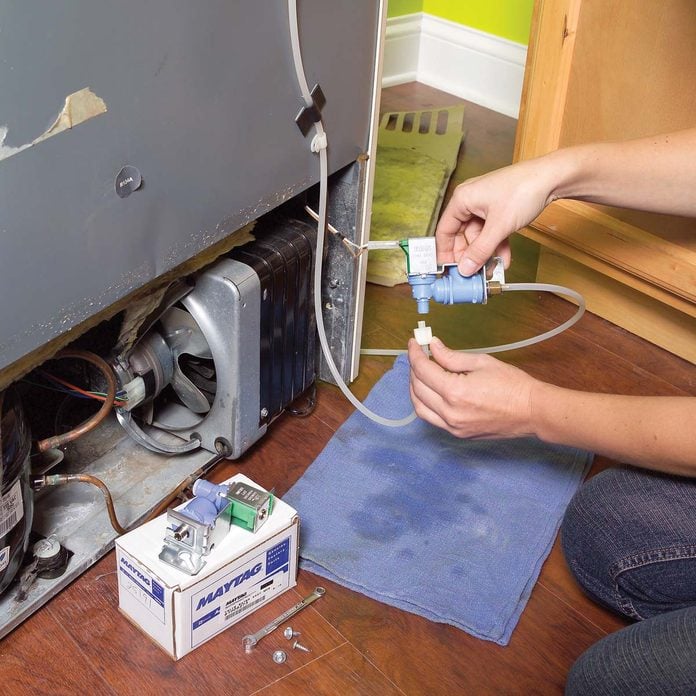
Replace the Inlet Valve
- At the back of your fridge, there'southward a small electrical "inlet valve" that turns the water supply to the water ice maker on and off.
- Pro tip: Before you supersede the valve, make sure water is flowing to information technology. Turn off the h2o at the saddle valve and disconnect the supply tube from the inlet valve.
- Concur the tube over a bucket and have a helper plough on the saddle valve.
- Pro tip: If water flows out of the tube, the water supply is fine and chances are the inlet valve is bad.
- To replace the inlet valve, unscrew the encompass console and remove the screws that hold the valve in place.
- Unplug the wiring and unscrew the nuts that connect the water lines.
- Contrary these steps to install the new valve.
- When the job is washed, turn the h2o dorsum on and check for leaks before you push the fridge back into place.
Stride 7
Fridge Repair Problem: The Fridge Produces Puddles
- The water supply lines that serve water ice makers or water dispensers tin can leak and make pools under the fridge. Simply a refrigerator without these features tin can create water problems too.
- Every refrigerator produces water in the form of condensation and melting ice.
- When the system that deals with this water fails, y'all can end up with puddles within and outside of the fridge.

Step 8
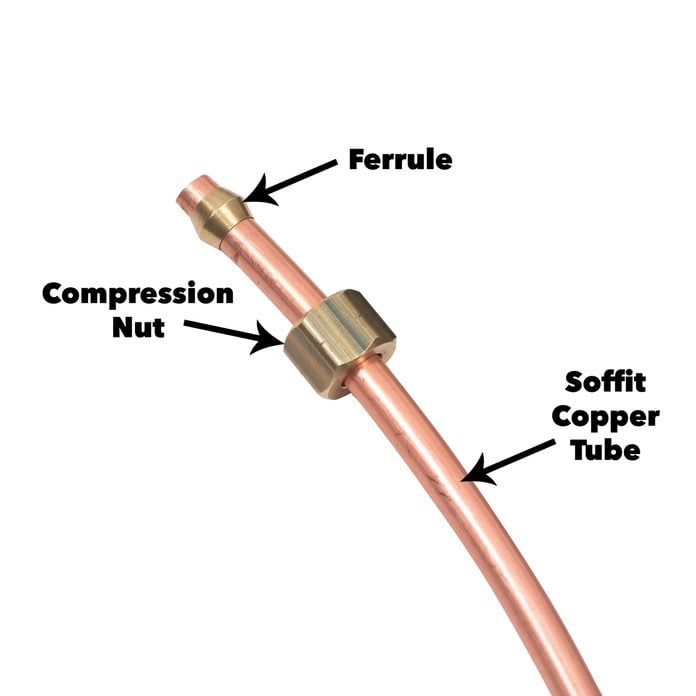
Leak-Prone Parts of a Compression Plumbing equipment
- Starting time, check the water supply line.
- If your fridge has an water ice maker or water dispenser, pull out the refrigerator and look for a leak.
- If in that location's a leak at the inlet valve, tighten the pinch basics.
- If the plastic or copper tube is leaking, supervene upon it.
- Pro tip: Tubing is usually continued to the saddle valve and inlet valve with screw on compression fittings.
Step ix
Bank check the Refrigerator With a Level
- Water drains into a pan under the fridge where it evaporates. If your refrigerator is badly tilted, water tin can spill out of the pan. Leveling the refrigerator solves this problem.
- To level the fridge, accommodate the refrigerator and so it's level from side to side and tilted astern.
- Stack quarters near the back and set a two-foot level on them.
- When the bubble shows level, the tilt is correct.

Step 10
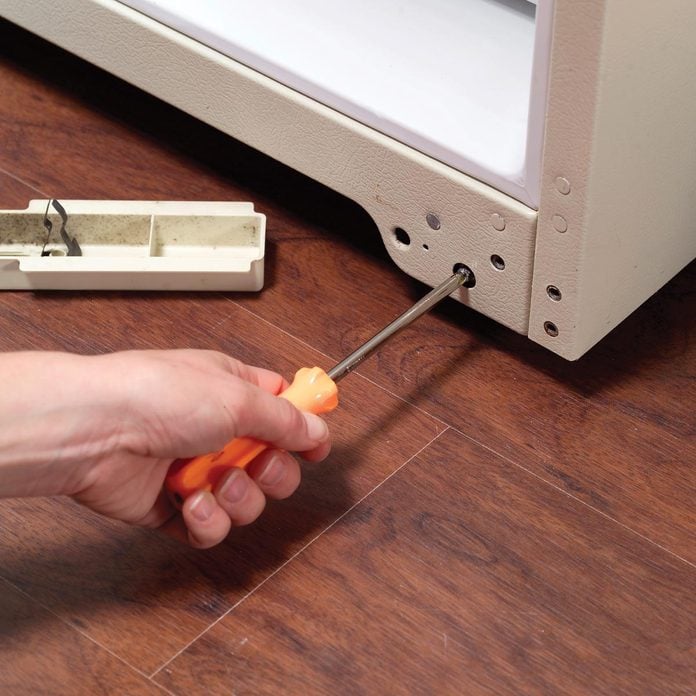
Use the Aligning Screws
- Pull off the front cover grille to level or tilt the refrigerator.
- Turn adjustment screws to raise or lower the front corners of the refrigerator.
Step 11
Lift the Back Cover Console
- If the bleed tube in the freezer gets plugged, water leaks into the compartment below or onto the floor.
- To unplug it, outset remove the cover panel.
- Remove the screws that hold the dorsum cover panel in identify.
- On some models, you lot have to pry out plastic screw covers with a putty knife to expose the screws for freezer repair. In some models, you have to unscrew the floor console too.

Step 12
Clear the Drain Pigsty
- Use a hair dryer to melt whatever ice buildup.
- Sop away the melt water with a sponge. Then clean up around the drain pigsty.
- Insert a tube in the drain hole and blow out any droppings for freezer repair.
- Pro tip: Any tube that fits tightly into the hole volition work. Yous can also use a tire pump or air compressor (turn the force per unit area down to xxx psi).
- Pour a loving cup of water into the tube to make certain information technology drains before you replace the encompass panel.

Footstep 13
Refrigerator Repair Problem: Fridge or Freezer Won't Absurd
- There are lots of malfunctions that can take the chill out of your fridge.
- One common cause of suddenly soft ice cream or warm juice is a simple loss of electricity.
- If the low-cal doesn't come on when you open the fridge door, brand sure the fridge is plugged in and check the breaker console.
- If the fridge runs merely doesn't go common cold plenty, chances are one of the post-obit fixes will restore the arctic.

Step xiv
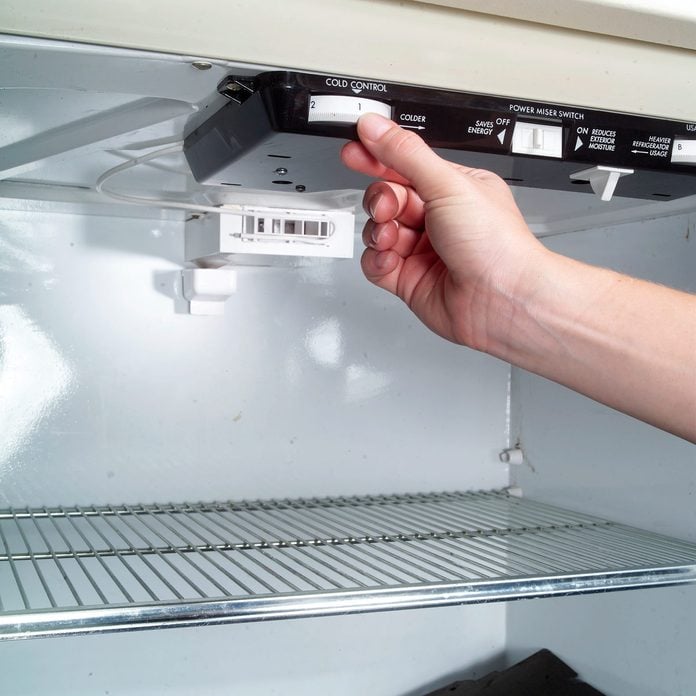
Check the Temperature Command Dial
- First, check the thermostat and vents. The temperature control dial within the fridge is sometimes irresistible to curious kids.
- Make sure it hasn't been turned mode down.
- Also brand sure the vents in the fridge and freezer compartment aren't blocked by food containers. These vents supply the flow of frigid air.
Step 15
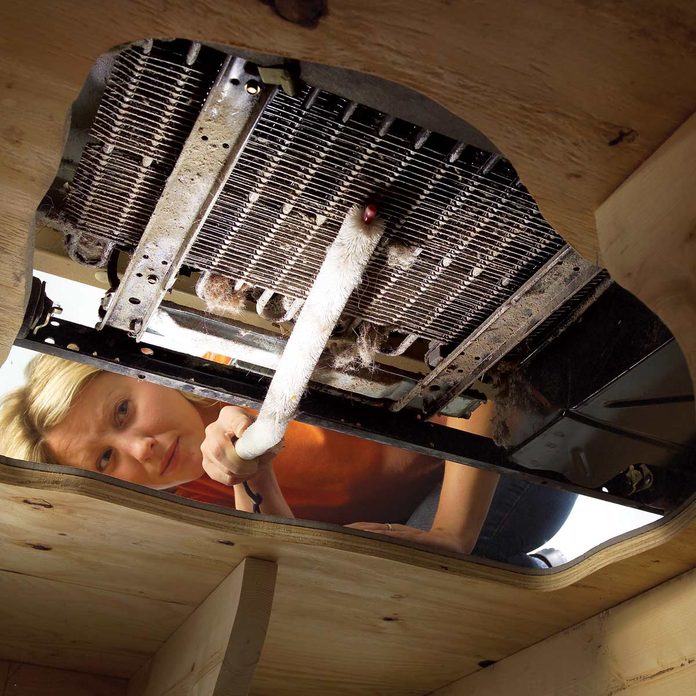
Clean the Coils
- In order for your fridge to create a chill, air has to menses freely through the condenser coils. On well-nigh older refrigerators, these coils are on the backside.
- Cereal boxes on top of the fridge or grocery numberless stuffed behind it can reduce the needed airflow.
- About newer refrigerators have coils underneath, where they can be blocked by trash and clogged with dust.
- Even if your refrigerator is working fine, you should pull off the front grille and clean the coils every year for efficient operation. Do information technology every half dozen months if you have shedding pets.
- Long brushes are available at apparatus stores for $8.
- Clean the coils so air can menstruation through them.
- Pull dust and fur balls from below and between coils with a long brush.
Step sixteen
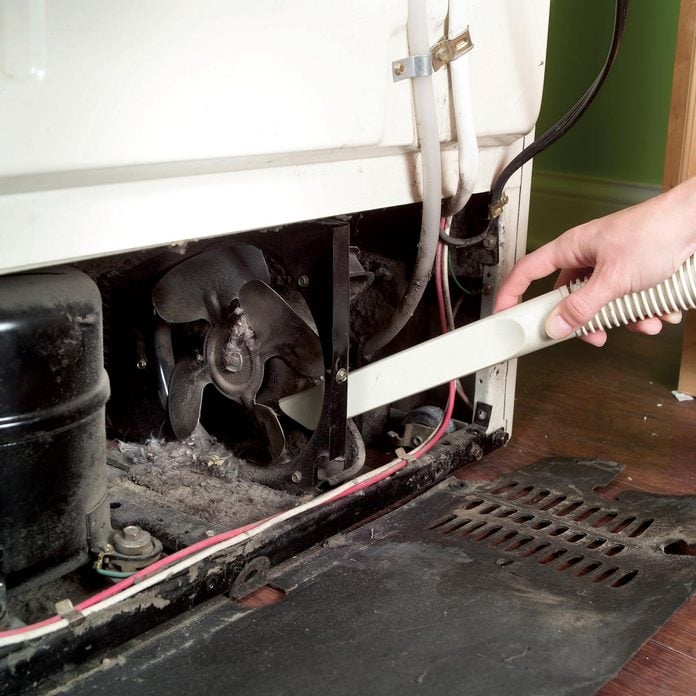
Vacuum the Fan
- Coils on the back of a fridge create their own airflow as they heat up.
- Models with coils underneath have a fan to push button air through them.
- Grit buildup tin can tiresome the fan. Wads of paper or other trash can stop it altogether.
- Pull out the refrigerator and unscrew the cover console.
- Vacuum the fan. And then start the refrigerator to brand sure the fan turns freely.
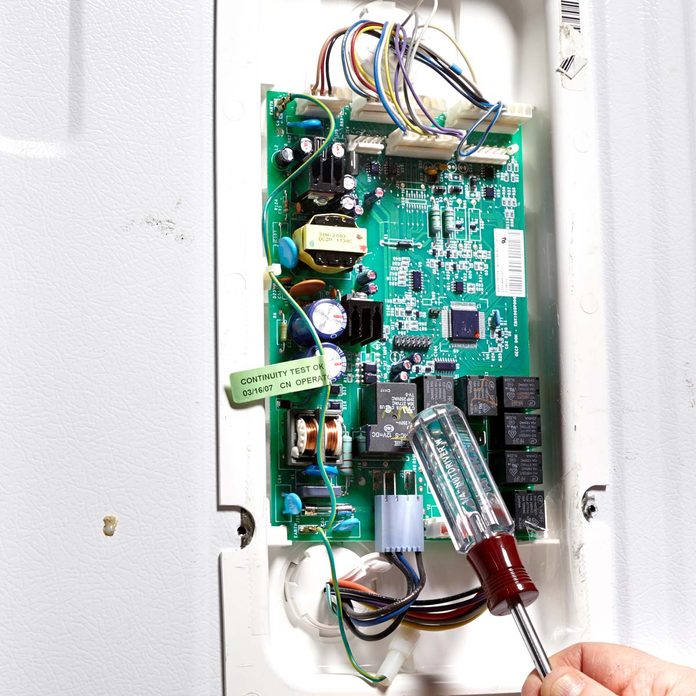
Footstep 17
Diagnose a Bum Refrigerator Circuit Board
- If your refrigerator isn't keeping food common cold, the cause could be a burned circuit board or a sticking excursion board relay.
- Before calling for repair service, try this flim-flam.
- Unplug the fridge and gyre it out.
- Remove any metal cover plates or cardboard access panels on the back and look for a circuit board.
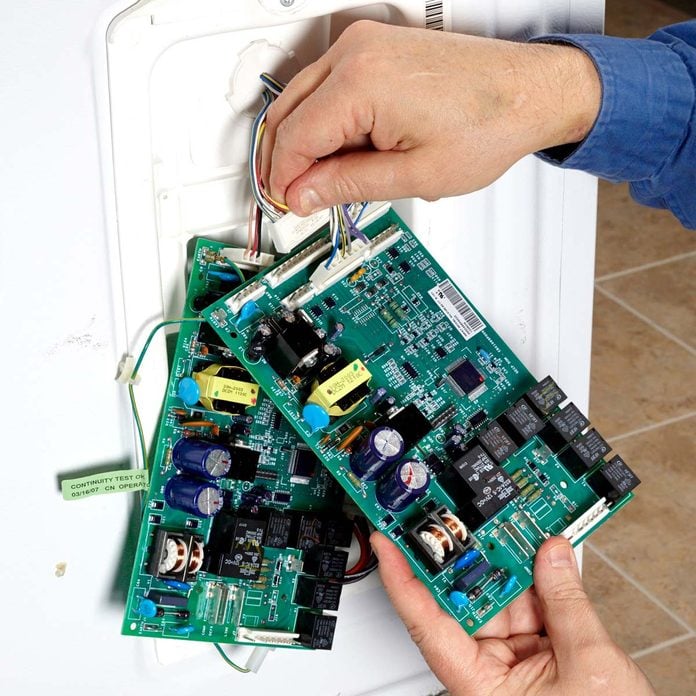
- Examine the board for burn marks. If yous see whatever, replace them.
- Movement the printing-on connectors to the new lath one at a time.
- Press each connector onto the header pins until it'south firmly seated.
- If the lath looks good, locate the largest relay on the board (look for the largest rectangular plastic box).
- Then plug in the fridge (don't affect whatever wires!). Tap lightly on the compressor relay to rattle the electrical contacts within.
- If the fridge starts, you need a new excursion board.
Step 18
Replace a Bum Fridge Circuit Board
- If there are no burn marks and the borer doesn't work, or the compressor makes a humming or clicking sound and and so shuts off, the problem may be a relay located on the compressor itself.
- To learn how to do that ready, see fridge compressor repair.
Step xix
Refrigerator Repair Problem: A Noisy Refrigerator
- Refrigerator noise comes from the compressor under the refrigerator, the condenser fan motor under the refrigerator, or the evaporator fan motor inside the freezer.
- Open the freezer door while the refrigerator is running. If the noise doesn't get louder when you open the freezer, pull out the refrigerator.
- Most refrigerators have a condenser fan motor. Unscrew the back cover and listen. You'll be able to tell whether the noise is coming from the fan or the compressor.
- The all-time cure for a loud compressor is unremarkably a new fridge.
- To supervene upon the fan motor, remove its mounting screws, unplug it and install the new one.

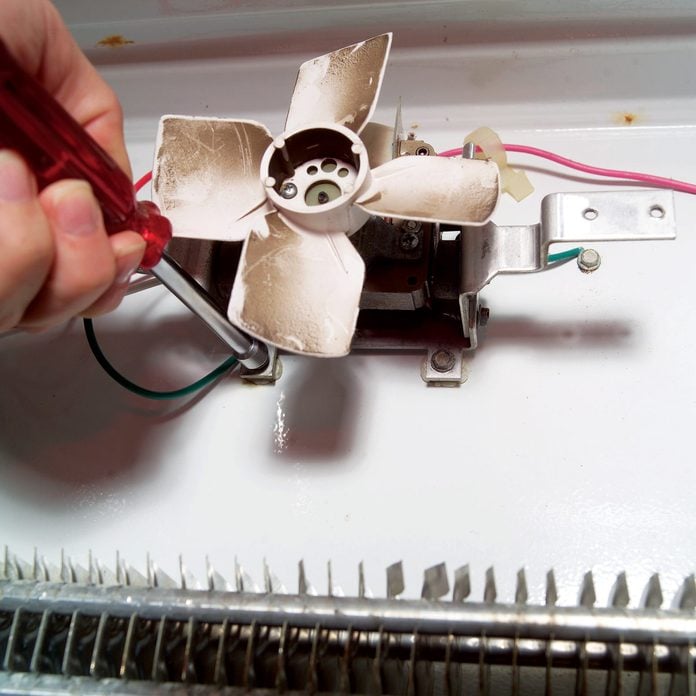
Step 20
Remove the Fan
- If the sound gets louder when you open the freezer, the evaporator fan motor is the noisy culprit. This refrigerator motor is easy to replace.
- Your fan may non wait exactly like the fan we show here, only the basic steps are the same.
- Unscrew the fan from the rear wall of the freezer and unplug the wires.
- With some models, you'll need a socket prepare or nut commuter to remove the fan.
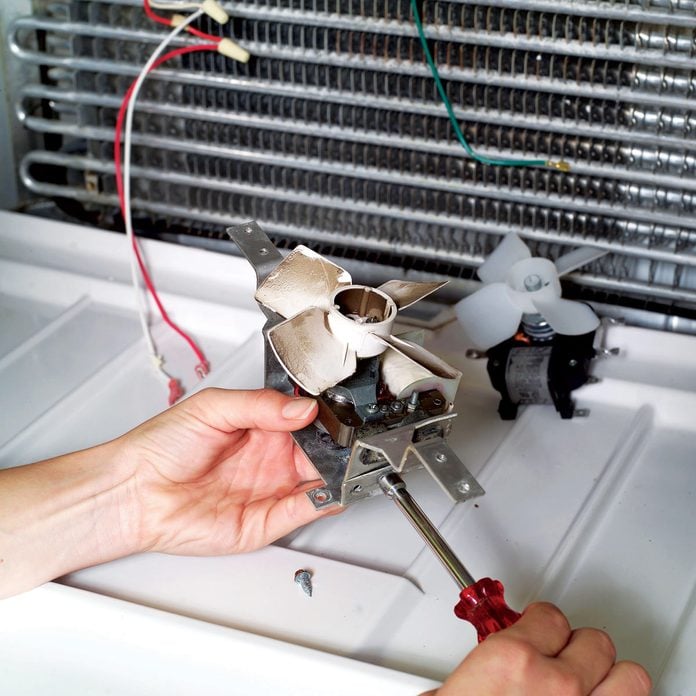
Stride 21
Supervene upon the Old Fan
- Remove the fan fridge motor from its mounting bracket.
- Fasten the new fan to the mounting bracket, reconnect the wires and screw the new fan into place.
Step 22
Finding Fridge Parts
- To get the right function for your refrigerator, you lot'll need the model number, which is usually stamped on a tag inside the fridge. If you can't detect information technology anywhere on or inside the fridge, check your owner's manual.
- To locate a parts dealer in your area, search "Appliances, Major, Parts near me."
- To mail-order parts for any major brand, go to www.sears.com or call (800) 4-MY-HOME.

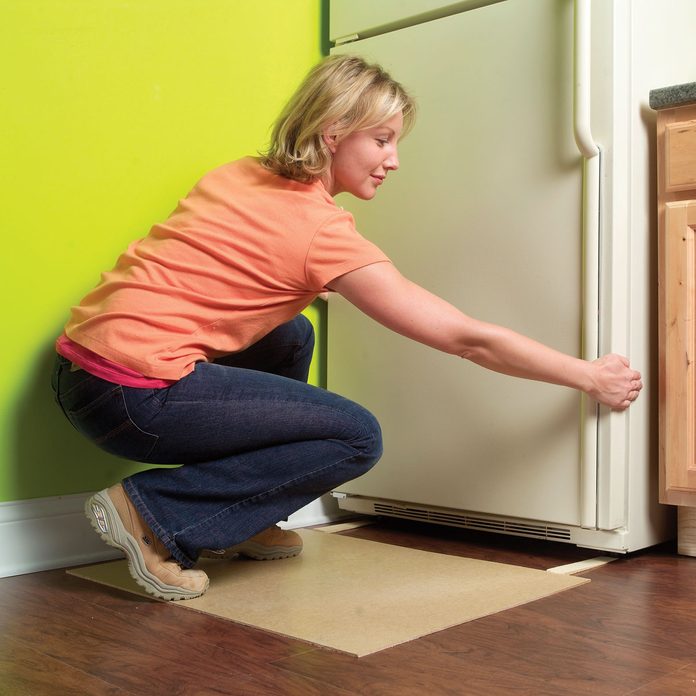
Stride 23
Don't Wreck The Floor When You lot Pull Out The Fridge
- Nine times out of x, you tin pull out a fridge without any damage to the flooring.
- But a sideways sideslip or a grain of sand caught under a cycle can scar whatever floor.
- At the very least, lay downwards a cardboard runway before dragging out your fridge.
- For the ultimate flooring protection, apply 1/8-in. hardboard (at home centers).
- A pair of shims create a ramp for easier pulling.

Source: https://www.familyhandyman.com/project/how-to-repair-a-refrigerator/
Posted by: raymandetlable1942.blogspot.com
0 Response to "How To Diy Repair Refrigerator"
Post a Comment